Saturday 3 November 2012

Mini Project: Temperature Measurement & Logging

Ability. My electronic multimeter does not have the ability to record temperature. Or does it? Long story short, I love beer, and have been thinking about constructing my own home brew system in a spare bedroom cupboard for a while. However, that room gets a lot of light, and may be too hot for brewing. So I needed to get an idea of how the temperature varies in there over time. Unfortunately my multimeter is an el cheapo Dick Smith variety (before Dick Smith submitted to Jaycar as supreme overlord of electrical components), and only has the basic functions. So I thought about whether I could use some sort of variable resistor to get a number that represented temperature, which I could calculate from there. Enter the $1.35 thermistor.


So the idea is that this is hooked up to the ports of your multimeter, and set to resistance (20KΩ). The reading you get can then be compared against a table of known values for this type of thermistor, or put through an exponential equation for more accuracy. 

Old ATX PSU 12V plug, some speaker wire, and a bit of 
heat shrink to make the probe
Utilising the furtherest apart pins only, so the standard 
multimeter probes can be used
And after a few minutes of soldering, we have the finished product:
New temperature probe, compatible with pin-type multimeter probes

From here, I had to let it sit for a while to check that it actually worked, and reasonably accurately. Of course, "accurately" is subjective when I've got nothing to compare it against, so I watched it and decided whether it was giving a sensible reading or not. After about 20 minutes sitting on my desk, not being disturbed or coming into contact with anything (other than the atmosphere), it seemed to stabilise at 14.60KΩ, indicating a temperature between 16-17°C - which is about what it felt at the time.

Part way through testing the probe on my desk, indicating a temperature of 20-21°C

The next step was to put it in the cupboard and record the values over a 24 hour period. The best way I have of doing that is by using my camera (Canon A650IS) with CHDK firmware, running an intervalometer script. I didn't want to have hundreds of photos to go through and get the values out of, and the temperature wasn't going to vary noticeably every 15 seconds. So I set the script to operate with a 5 minute delay (to stabilise the temperature once I closed the doors), and then take a photo every 30 minutes, for 24 hours consecutively (total 48 photos).

Measuring the temperature. Probe is dangling in front of the box
So now we play the waiting game. Unfortunately I've misplaced (see: stolen by a parallel universe being) my external power cable for the camera, and wasn't able to knock one up (without enormous amounts of swearing). With any luck, the batteries will hold for the 24 hours. It's running without the screen or flash (backlit LCD on the multimeter, fancy), so power consumption is somewhat minimised. Ideally, I want the temperatures somwhere in the range of 15-25°C. I'll graph the results for the hell of it when it's finished. 

If all goes well, I'll go hunting for a 25L water cube I've got somewhere (one of those ones that has a threaded bung for fitting a tap to it), and look into a heating pad, small ~80L secondhand bar fridge, and something like an STM 1000 temperature controller (hot on/cold off, hot off/cold on).


Stay tuned.

Edit: Camera made it from 1500 to 0100, so I got some data. Temperature rose until around 9pm, where it began to decline. The range is only 2°C with 22-24°C, so my plan should work fine.

Temperature and shit


So, now to start collecting bottles, get a fermenter, old fridge, heat pad, etc, etc, etc.....

Tuesday 10 July 2012

Project: Headphone & Speaker Selector

Choice. With the way and where my computer is set up at the moment, sometimes I use the speakers built into my monitor to listen to music, sometimes it's more appropriate to use my kick arse Sennheiser headphones instead. Being that my computer is set up in the corner of the lounge room, the headphones allow everyone to have their way. The problem is if I want to use the headphones after I've used the monitor speakers, I have get under the desk and unplug cables. This usually results in me hitting my head on the bottom of my desk, and swearing gratuitously. And it's just a mild inconvenience.

So I had the idea of building a small selector with a rocker switch. Everything would stay plugged in neatly to a small box on my desk, and to switch outputs I simply alternate the rocker switch. Seemed simple enough, so I came up with this.


The original concept circuit diagram...before things went horribly wrong.


This all looked great on the screen, seemed logical in my head. Both outputs would have shared left and right channels, and the earth would be switched by a SPDT rocker switch (http://www.jaycar.com.au/productView.asp?ID=SK0991). The logic was that without an earth the inactive output would be exactly that - inactive. Unfortunately this is not how things work in reality, and it resulted in all sorts of unexplainable observations and continuity readings. Basically the rocker switch did not work as desired, and the left channel on both outputs was intermittent to missing altogether. Back to the drawing board.

Further Google Fu-ing revealed someone else that had had the same need for a device like this, and they'd been kind enough to blog about it and post a circuit diagram. Which I shamefully stole and forgot to get the link for crediting (if it's yours, let me know and I shall credit you). It is the same principal, just the opposite - both outputs share their earth, and it is the left and right channels that are switched by the rocker. This meant I needed a DPDT 6 pin switch, which funnily enough Jaycar didn't stock (in rocker form, anyway). Ebay had my back. Basically the unit as before, just twice as many pins.


The circuit I ended up following. Notice how it is basically the total opposite I what I designed.


After waiting about two weeks for my new switch to show up in the mail, I realised the small plastic project box I had initially built my failed design into wasn't actually big enough to handle the new 6p DPDT switch. So I scrounged around....and found the left over box from out ATV2 unit. It's actually a decent box, as far as being excited about cardboard goes. I cut it down so that I had just a short section of the bottom. As an enclosure for the device, the bottom will remain open just for convenience, but it won't be seen unless it's picked up off the desk.

Testing the assembled circuit BEFORE putting it all into it's enclosure. Foresight! FORESIGHT!


And it worked. As you would expect. Which needless to say I'm pretty fucken happy about. One step closer to total automation/death by physical inactivity.

The bottom of the device, showing all inputs/outputs, and the 6p DPDT switch.

The finished product. Like a boss.


And that's it. It's not overly pretty; I mean I could have gone to Jaycar and bought a suitable enclosure. But that means stuffing around drilling holes (I don't have a drill), making a mess, spending more time on it than I can be bothered. And this way uses stuff I just had lying around. Enjoy.


-Tim
PS: apologies if the formatting in this post looks SUPER shit. For some reason the blogger text editor is being a pain to do simple things today.

Monday 2 July 2012

Project: Home Media Solution

Stuck. We had just moved out of a house with a great media set up. It had a purpose-built PC in a slim line case, 2TB HDD, and everything necessary to output 1080p. Each of us had our own computers running wirelessly off an ADSL2+ 20Mbps (max) internet connection, through a beastly a/b/g/n triple antenna router (not sure what specifically). This allowed anyone to download anything they felt like watching, and "push" it to the media PC for watching as they pleased. Although it was usually quicker to copy via a small 500Gb passport drive; we didn't get around to USB 3.0. Anywho, the media PC ran MediaPortal (http://www.team-mediaportal.com/), a very capable free and open source piece of software that beautifully categorizes and displays all of your media content in a highly customisable  interface. It rarely had any issues, downloaded art automatically, and was generally awesome. So that was great until we moved out, and had to find our own solution. I looked into a similar setup, building a purpose-built PC, however it got pretty expensive pretty quickly (~$600). Unfortunately HDDs have been expensive lately due to a factory in China where most components for most HDDs are made flooding, and stock being in a bit of a shortage.

About a year before that, we received an Apple TV 2 as a gift (to compliment a new tv we'd bought). Unfortunately, anyone who has used it will know they're a fucking useless pain in the arse. A lovely to look at menu, but unless you're happy to pay for every single thing you want to watch (and probably have "anonymous" usage statistics recorded and sent periodically), even if you already own it in hard and digital formats - it is literally a paperweight. The way it works is when you sign into it with your Apple account (oh yes), you may then wirelessly (or ethernet LAN) stream media in your iTunes library (oh yes) to it via your home network. I know, you see the obvious problem here - you have to have an internet connection (to verify your Apple account sign in), you have to use iTunes, and it has to be media in your iTunes library (of Apple recognised and signed format). So yeah, great. I spent a few days converting about 300Gb of movies into what I thought was the right format to import in iTunes and stream to the ATV2. The closest we got was a movie playing - without sound. At that point in went back in it's box and was thrown into the back of cupboard likely to never see the light of day again. Until we moved, and it was suggested to see if it could be "modified" to be a lot more user friendly.

Jailbreak. About a month ago I started looking into hacking the ATV2 into running a different operating system. Perfect timing too - a hack and jailbreak kit had just been released allowing the media program XBMC (http://xbmc.org/) to be flashed onto it. XBMC is the XBox Media Centre, which has been ported to many platforms, and is probably the most popular media program around. Probably, I don't know. I went for the most brutal jailbreak option: permanent (untethered). There is a non permanent option (tethered), which resets to non-jailbroken status after a reboot. Which I really can't be fucked with. So, with this software and instructions (http://www.appletvhacks.net/2012/06/06/how-to-jailbreak-apple-tv-2-5-0-2-ios-5-1-1-using-seas0npass-untethered/), I SSH'd into the ATV2 over wifi, and started running Linux commands to install software from the appletvhacks.net repositories. Didn't take overly long.

SSHing into the ATV2 over wifi to force it to be my bitch.


Like with any Apple hardware, it tends to take a while to install/upgrade things. But no biggy. After some setting up (adding SMB servers to XBMC, setting folders permissions in Windows 7 on both PCs, etc), we can now browse and watch/listen our entire video and music collection across two separate PCs. As an added bonus, both of our phones can control playback remotely over wifi as well (iPhone 4 via AirPlay, which allows you to select XBMC or Frontrow [that's the standard Apple TV software, which is still operational outside of XBMC if you choose to use it] as the playback arena; and SGS2, via the XBMC Remote app - https://play.google.com/store/apps/details?id=org.xbmc.android.remote&feature=search_result#?t=W251bGwsMSwxLDEsIm9yZy54Ym1jLmFuZHJvaWQucmVtb3RlIl0.). So boss to be in a totally different part of the house and just quickly flick to a different song on the big stereo.

So this is what the overall layout is like at the moment. The small bit in red is a planned add on - wireless speakers for our courtyard. It'll run by splitting the stereo headphone output off the tv - unless I look into an optical audio to RCA convertor to bypass the tv altogether.

Media setup. Dotted lines are wifi connections. All this relies on a Dlink DIR-632 
dual antenna. Holds up superbly for around $70.


Finished product. Bit of playback going on as the background for the home screen.


Pretty self explanatory, from the name and purpose 
of the app to the awesomeness of my musical taste.


Life is great when shit works.


-Tim

Thursday 28 June 2012

Project: Beer Fridge Lighting

Flawed. My new beer fridge, a 50L-odd unheard of brand bought off eBay for $72, was basically brand new and unused. But it had a serious design problem - it was built without an internal light. So you know, when you go to get something from up the back or you didn't turn the light on as you entered the room, you can still see what you're doing. Nope. Ok, so it's a tiny fridge that only holds my beers, so it's hardly be a crime if I get the wrong beer, because it'll still be nice. But I wanted it anyway. Firstly, I nipped down to my usual hangout, Jaycar, and got this: http://www.jaycar.com.au/productView.asp?ID=ZD0462 - which is a 48cm hard strip of white LEDs that can be cut to length and run off 12v DC. Great for cars, boats, computers, etc. The fridge was, at the time, in my bedroom, so I had a few a cables running around.

The beer fridge where it was first placed in my bedroom. Notice the two power 
cable running along the wall.


I used some random speaker wire I had lying around to run power to the LEDs. This wire passed through the small hole in the rear top right corner of the fridge, which was there for the thermostat controls to pass through. When I bought the LEDs, I also asked the guy to provide me with a 12v DC power supply, however he must've been full of shit because it didn't work. Pretty sure it was the wrong one. Power then had to come from an auxillary output from my PC's PSU...which was great as long as it was on. I also had the original plug for the fridge to deal with.

My beer fridge, newly outfitted with about 18 white LEDs to the roof just inside.


Light was now available, but it was a bit crap because I had a few random wires everywhere and the light only turned on when I flicked the switch taped to the roof inside the fridge. It ended up staying like this for about 18 months, until holidays from uni showed up, and I got the chance to attack my ever growing list of projects. A few months back, I went digging. I have a huge box of assorted electric garbage, that every now and then puts out some solid gold. There just happened to be an laptop PSU, which output 12v DC. This was exactly what I needed to be able to run the relays of their own dedicated supply, and through just one plug (instead of separate plugs for the LEDs and fridge). Unfortunately I didn't take any photos of this, but I used something similar to these: http://www.jaycar.com.au/productView.asp?ID=HM3192 - cutting the power plugs off the fridge and 12v DC PSU, I wired their respective wires into shared connectors (earth from the fridge and LEDs into one connector, etc), then used the remaining fridge plug/cable to complete the circuit. Now the fridge and LEDs were running off the one plug. And this worked great. The last problem was having the LEDs operate like normal fridge lights - on when the door is opened, off when the door is closed.

I considered relays, and mounting momentary normally closed push button switches, but because of the design of the fridge door, there was really no easy way to mount it. And I wasn't too keen on drilling into the walls of the fridge, and potentially destroying the whole thing. Reed switches. While trolling the Jaycar site, I came upon this bad boy: http://www.jaycar.com.au/productView.asp?ID=LA5074 - a very small, normally open reed switch. Whilst it was backwards for my needs (circuit is open when the magnet moves away), I could use a 5 pin automotive relay to wire it in the opposite direction.

Circuit diagram plan - the text at the bottom refers to the normal operation of 
these kind of relays. The diagram is correct.


The plan was to have the relay switch the 12v DC output to an open pin when the magnet closed the reed switch, so that the LEDs would not operate. When the magnet moved away from the reed switch, power moves to the normally open pin - but actually goes to the LEDs and powers them up. Pretty standard operation of a relay I guess, but I think it's pretty cool. With that, check out the picture.

 LEDs in operation with reed switch and relay; notice the reed switch and magnet in the 
top right corner of the fridge?


And that's it. Pretty simply project I guess. The wiring for the reed switch unfortunately runs on the external top surface of the unit, so it's held down by copious amounts of duct tape. The relay is zip tied to the chassis, along with the 12v DC PSU and merging connector block. Many, delicious beers...


-Tim

Project: Car A2DP Bluetooth Receiver

Extortion. I'm pretty sure that was word I used when I started looking into how much it would cost to be able to use bluetooth to stream music from my phone to the head unit in my car. I have a Pioneer DEH-5850MP 50Wx4 unit, which I picked up second hand and works fine. Pioneer manufacture a bluetooth module that interfaces with their proprietary IP Bus socket on the back of the unit, and weighs in at something like $599 AUD last time I checked. My car isn't even worth that much. Additionally, the whole purpose of using bluetooth is to a) do away with cables, and b) be able to skip tracks without having to touch my phone. Which the Pioneer unit still wouldn't offer. So I started thinking about what I could hack together for the purpose.
Nokia BH-503 headphones.


The Nokia BH-503. These are the bluetooth headphones I use day to day for streaming music to my brain. Rechargeable, lightweight, and feature audio controls on the right side earpiece. I came up with the idea of using the PCB as the basis of a system that would suit my needs. I had a broken BH-501 (predecessor model, volume and call answer/end functionality only), so I drew up a circuit in the most bad arse design program going, MS Paint, to see how it would come together. The picture does have an obvious open circuit, which in hindsight needs a resistor, followed by connection to +12v DC to bring the supply voltage for the LEDs in the push buttons to 3.5-4.0v. More on illuminated push buttons later.

 BH-501 concept circuit diagram.


So that was cool. Guess the headset needed to be cracked open, to see how damn small the Fins had made it. Some of these pictures will be the BH-501, but towards the end they will all be the BH-503.

 BH-501 PCB, showing connections and former Nokia ingenuity.


There are three PCB mount push buttons, two pairs of speaker wires, a pair of wires for the battery, and the microphone. The processor is beneath the copper shield. Because I guess he's a douche. Anyway, knowing minimal about TRS audio configurations, I had to work out how to attach a female 3.5mm stereo TRS socket to the PCB using the four speaker pads. So that's four wires off the PCB going into three on the socket. The assumption was made that both channels can get away with a shared earth, whilst the positive sides go to their respective pins on the socket to keep the channels separated. Funnily enough, this actually worked. I did this by putting a tiny U-shaped piece of wire between the two earth pads, then attaching the TRS socket earth wire to one of them.

My old Nokia N900, which I literally sold today, A2DPing Radiohead to my 
PC speakers via the connected TRS socket.


The next step was power. The BH-501/3 runs on 3.7v DC, as is cleverly stated on the front of the 260mAh battery that powers it. Herp derp. So I figured running 12v DC from my car battery through it may cause some slight problems. In comes the LM317T, who sits down and says "I got this guys". The LM317T is a voltage regulator that can be used for reducing input voltage to an appropriate level. I'm sure it does other things too. Using the datasheet, LM317T calculator (http://www.reuk.co.uk/LM317-Voltage-Calculator.htm) and my multimeter, I worked out what resistors to run it with to achieve the right voltage. Initially I had R1 set at 240Ω, and R2 at 470Ω, which resulted in 3.67v; unfortunately this caused some noise in the end product (crackles). Talking with an audio enthusiast over on TMO (talk.maemo.org), it was suggested to bump up the supply voltage slightly, as bluetooth audio units tend to play up under limited power conditions. With R1 at 220Ω, and R2 at 470Ω still, we were running nicely at 3.9v DC. It must've been quite funny for my neighbors to see me come outside with this bundle of wires that probably looked like a bomb, some headphones and a phone, hook them up to my car battery for five minutes, then go back in the house. Aaaand repeat. Many times over.

BH-501 running off 12v DC by use of a LM317T. And a lot of swearing.


So fast forward a bit, and skipping the plethora of problems I encountered (mostly inability to sensibly place components on a protoboard), I was ready to mount the BH-503 board in a project box, with a cable bundle coming out of a hole in the side, with all the necessary plugs. I didn't take a picture of this, but after using the finished project for a few weeks I started to smell that plastic-getting-slightly-too-hot-but-not-burning-yet smell. The LM317T was converting the excess voltage to heat, which I somehow calculated using some physics maths on found on the internet, and then measured. Temperature was reaching around 75°C, so I built a very small power circuit on a piece of protoboard, allowing the LM317T to be free standing (instead of laying down under a layer of tape), and then made a heat sink out of a bit of an old computer case. I also drilled three 6mm hole in the lid directly above the heat sink, and it's been fine ever since.

How it initially went in the car, before the overheating issue.

Close up of the component layout inside the project box (pre-overheat).


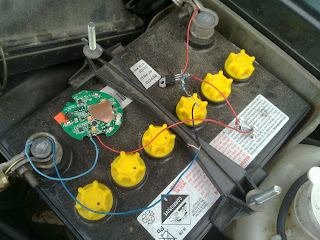
The last thing I needed to do was create a bank of buttons to control the BH-503, and the music I'm listening to. I only needed seek/skip backwards, play/pause, and seek/skip forwards, so I bought three back lit PCB mount push button switches (http://www.jaycar.com.au/productView.asp?ID=SP0614). Because the amps available to the unit is whatever my alternator puts out (probably minimum 70A), I can run the LEDs in the push button switches on the same power circuit. Well, there's probably a better way to do it, but that was my logic and it works well. Using an LED array calculator (http://led.linear1.org/led.wiz), I worked out I only needed one 10Ω resistor to power the bank. This was made as small as possible, to mount in the dash fascia between the bottom of my head unit and the pocket where I put my phone while driving.

The bank of LED back lit push button switches mounted in the removable dash fascia.

Front view of the bank.


And with that, came time to mount it in the car. The car in question is a 1995 Mitsubishi TS Magna sedan (executive), sporting the "burly" combination of a V6 and manual transmission. Because it's basically a poverty pack, I have a lot of room in front of the gear stick and directly below the head unit. Perfect for fitting stuff in - if I was doing a carputer I'd be set. The box is now mounted to the dash support frame with the most versatile and useful building material known to man, the zip tie, with the plugs for power, lights and button bank going off in their respective directions. The head unit is connected to this fire hazard by an IP bus to 3.5mm TRS male cable, off eBay for a few bucks. Love it how all these weird cable combinations all come out of Hong Kong. They must have some insane backyard hacking going on over there.

And we're left with this.

The finished product, with horrible reflective dome self-tappers.

This has all been running wonderfully for about six months now, firstly with my N900, and now an SGS2. I should mention the multifunction button that turns the unit on and off and makes new pairings, is routed to a blank factory button on my dash just above the head unit. Unfortunately, the head unit has to be turned up to 50/60 (volume) to get loud sound out of it, so I'm looking into building a small inline amplifier to boost the signal before it reaches the head unit. Enjoy, modify to your own needs.


-Tim

Edit: found a completed picture!


Completed unit after the overheating incident. Notice the power 
circuit with heat sink.


404: High quality work not found

Yep. You've stumbled onto one of the less polished corners of the internet. Where things kind of work, but are mostly unfinished, occupying space, and a nightmare to stand on in bare feet. It's my dumping ground for electronic ideas, and the occasional idea that makes it past the thunderclap headache they usually arrive with. I am by no means an engineer, as you shall see, but I've surprised myself with what a lot of hours of research can do. Maybe it'll be interesting to someone. Perhaps you? Likely not.

My "workshop", which looks like this 95% of the time.

-Tim